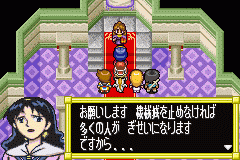
 | You'll start out in Vane now, directly in front of the Guild. Enter the guild and go up to talk to Lemia. Mia cuts to seriousness and tells her mother that they must be allowed into the Silver Spire; Lemia is very reluctant since it's almost never to be entered, but realizes the situation and allows her in. Mia asks about the townspeople, and Lemia says they'll begin evacuating the city now (you'll understand why later). Lemia comments on how strong Mia has become and how proud she is. |
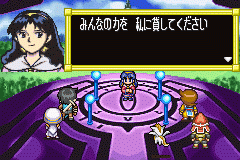 | After speaking to Lemia, enter the Silver Spire. The entrance is in the upper-left part of the guild, through the double-doors. Enter and speak to the guard; he tells Mia he understands that he must leave the city and lets her by. Go to the door. Mia completes the incantation to open the door and you enter in time to see the Grindery heading for the Goddess Tower. Once in, Mia hears her mother's voice letting her know everyone in Vane is safely evacuated to Black Rose Street. She tells Mia to take care and she continues. She thanks everyone else for coming with her and, after their encouragement, uses the spire to take control of Vane. Just as the Grindery fires off a shot at the Goddess Tower, Mia manages to fly Vane in between the two and block the shot, sending Vane falling to the ground in the process. Everyone rouses themself back up after the impact, apparently fine. Mia thanks them all once again and asks if they could go to Black Rose Street first before storming into the Grindery. |
11.2) MERIBIA - Everyone Safe
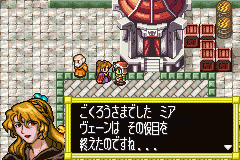 | You start out here on Black Rose Street. Go to the western end to find Lemia and speak with her. She'll thank Mia for what she's done; Mia apologizes that such a thing had to happen to Vane, but Lemia tells her that what she did very well saved the entire world and even preserved the future of the Magic Guild: they can rebuild it. Exit Meribia on foot--be sure to heal up at the Althena's Statue on your way out. Before you leave, though, if you're interested then use the White Dragon Wings to warp to Lyton, from there go to the Ayakashi Forest, and go all the way east to the springs--you can now trade with this guy for a Hi-Nash card. Anyway, warp back to Meribia from here. |
11.3) GRINDERY - Everything Comes Together
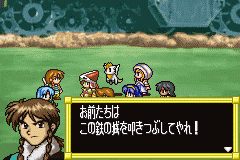 | Now go to the Grindery; it's sitting there in the upper-right corner of the map of the Katarina Zone. Enter and as you try you're ambushed by four demons. Nash and Mia realize that they're coming from inside the Grindery, and as more come along they won't have time to find a way to enter. Not to worry, though; Tempest and Fresca once again come to the rescue. They don't forget the help Alex gave the Plains Tribe, says Fresca, and now they're here to repay that debt. Tempest says he'll cover Alex and the rest as they enter the Grindery. So, you're off. |
Dungeon Items:
[Floor 1] Heal Drop (2), Angel Dress
[Floor 2] Mental Drop
[Floor 3] Mental Drop, Angel Wrist, Angel Ring
[Floor 4] Dark Shield
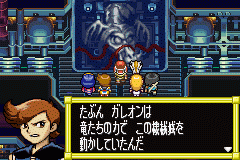 | Once in, you can't go back. The Grindery is very maze-like, especially with the tunnels that transport you from place to place, but there aren't a whole lot of dead-ends and tricks. From the entrance go immediately east all the way to the end, then take the path north. Get the Heal Drop in the corner and enter the tunnel right beside the chest. From here go west and north to go through the next tunnel. Now go west and north to find a chest with another Heal Drop. From the chest go west and enter the next tunnel. From there go east and you'll find Quark wired up. It's cruel, but apparently Nash sees that Ghaleon is using the power of the dragons to fuel the Grindery. Everyone doubles their resolve and you can continue. From here go directly east along the northern wall and in the corner you'll find a chest with an Angel Dress for Jessica. Now continue east and go through the tunnel to the second floor. Go south and continue along the path; pick up the Mental Drop on the way. When the path turns east, ignore the two tunnels and you'll come to the Red Dragon this time. From the dragon continue east, then go south and continue along this path until you go through the tunnel leading up to the third floor. |
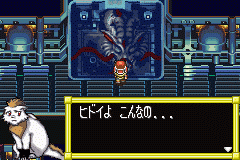 | On this floor go east then north in the big room to find the Blue Dragon. From her, continue east and take the next little path north to get a Mental Drop. Go back down and take the next little path north and go through the tunnel. On the other side of the tunnel pick up the Angel Wrist. Go south and take the path to the west a little. Then go north and continue west along the path all the way; you'll find an Angel Ring in the corner. From there go south and through the door leading up to the fourth floor. Now go south from the door and continue along the path to the next tunnel, then northwest to the next tunnel, then east and north to the next tunnel. Now, go west then north all the way to the next tunnel. From here go west and you'll find the Black Dragon. Continue past the dragon and pick up the Dark Shield in the chest. Now go south from the chest and continue along the path to take the last tunnel up. |
Dungeon Items:
[Garden] Morning Star, Angel Brace
[Floor 1] Master Suit, Ritual Robe, Heal Ring
[Floor 2] Dark Mask, Goddess Bandanna
[Floor 3] Dream Ribbon
[Floor 4] Heal Drop, Mental Gum
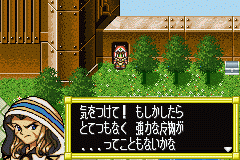 | You'll come to a clearing--a garden, actually. Odd place for one, and on top of that Jessica warns everyone to take care--but, she doesn't even notice any enemies in the vicinity. If you explore around you'll see fairies--apparently Ghaleon has a fondness for them, and so set up a sanctuary for them (remember the incident back in Goat Forest?). Pick up the Morning Star in the northeast corner of this area, and the Angel Brace along the western wall in the middle. There's also an Althena's Statue if you want to heal in the center of the garden. Once you're ready, go through the door in the middle to enter the second part of the dungeon. |
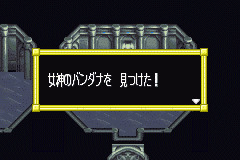 | Now you enter a much different part of the Grindery that's slightly easier to get through. From the door go immediately west, south, then all the way west. Go north to the next room and pick up a Master Suit. Go back down one room and then go all the way east, but go through the second doorway up and get a Ritual Robe. Go back down and all the way east. Go south one room and pick up another valuable Heal Ring. Go south another room then west until you see a big opening to the north in the middle. Go north and up the stairs in the middle to the second floor. Now go immediately west, a little north, then take that path all the way west. Take the second path south and pick up the Dark Mask in that room. Go back up and then go all the way east to the opposite end of the floor. Take the last path to the north and get the Goddess Bandanna in this room. Go back down and back east; take the path north in the middle of the floor and go up the stairs. On the third floor go east and take the second path south. Go south all the way to the bottom of the floor then go all the way west past the stairs. Pick up the Dream Ribbon at the end. Now go back east and take the stairs up to the last floor. |
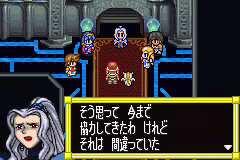 | Get the chest with a Heal Drop right below the door. Go east all the way to the other end of the room and get the Mental Gum in the chest there. Now go north along the red carpet. Approach the door at the end and check it out. Kyle will volunteer to crack it open, but sees there's no keyhole; Mia sees that it's sealed by strong magic instead. Kyle again tries to open it unsuccessfully. Just then you hear a voice from behind--Phacia teleports in willing to help you, but terribly wounded. She recites the incantation to open it and says the Magic Emperor and Luna lie ahead. Phacia explains that she once believed Ghaleon would be the one to finally turn green the bleak and barren Frontier, and the rest of the Vile Tribe followed him. In exchange for their help, Kyle supposes, but Phacia corrects him: Ghaleon never promised anything, but before they knew it the Vile Tribe was itself enslaved. Ghaleon then sought to enslave Althena, and Phacia saw what were his true motives. Just then, Xenobia and Royce come in. Phacia pleads with them to stop cooperating with Ghaleon, but they quickly silence her. Phacia then comes in between them and you, and tells Alex to hurry on into the next room. |
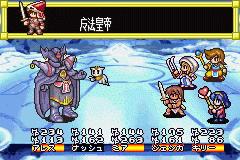 | Once in the next room, go northward to get to Luna. But, the Magic Emperor immediately blocks Alex's way. He pushes Alex back and you begin a battle. He has somewhere around 6000HP or so; so this battle shouldn't be as hard as you may think. I just used my normal strategy--in case you forgot, or skipped ahead to this part of the walkthrough, it's: first turn have Alex Kiai, Nash use Charge or Thunder Rain, Jessica use Protect Litany, Mia use Grand Weapon on Kyle, and Kyle use Heat Up. Then have Alex use Sword Dance, Nash use Thunderbolt, Mia cast Fire Blast, and Kyle first use Shine Sword then regular attacks. Have Jessica alternate turns between attacking regularly and healing the party. It took me about 4 turns this way--especially since Alex can do 1000HP of damage with the Kiai + Sword Dance combo it's easy. |
 | After he's defeated, Alex continues on to save Luna. At everyone else's encouragement, he climbs the stairs. But once there, he sees Luna with a blank look once more. She tells him that he knows nothing: the Luna he once knew is no longer, that she has been purged from inside of her. She then summons up the floating castle and Ghaleon comes in. Alex asks again what Luna has to do with any of this. It's not until now that Alex finally has the obvious explained to him: Luna is the Goddess Althena. Fifteen years ago the child brought to Alex's parents and raised by them was really the human form, or encasing, of the goddess. But now, Ghaleon possesses that power. He then leaves for their new fortress and strikes Alex and his party down. |
11.4) MERIBIA - Finding Lost Hope
 | Alex wakes up to find himself revived and back in Meribia, with Jessica and Nash beside him. They explain what happened and tell Alex that they still haven't seen Mia nor Kyle. Once you join back up with Jessica and Nash you're free to move around again. Exit Mel's Mansion and a guard will run up to you saying he saw Mia in the square of the city. Nash demands to know exactly where she is; Nall tells him to calm down. Jessica asks how she's doing, and the guard replies that she seems incredibly depressed, unfortunately. |
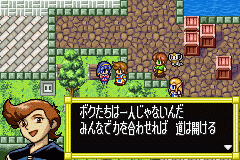 | Your first task then is to find Mia. Go to the southern side of town to a small park, you should find her on a bench there. When you approach and try to talk, Nash asks if Alex would let him speak to her personally first. Nash approaches her and Mia looks up. She tells him that she used to have hope that they could defeat Ghaleon but now she's seen how powerful he is. Nash tells her that he once thought the same way too--when he joined with Taben. But Mia brought him back to his senses. He would hate for Mia to become the same way that Nash once was and gives her encouragement. Mia thinks over it and sees it the same way. Revived, she smiles once again, apologizes for her absence and rejoins the group. |
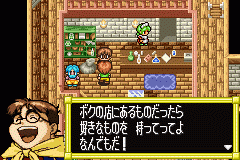 | Continuing, now you have to find Kyle. Before you look for him you might want to consider selling the remaining items you don't really need. I suggest you make a visit to Ramus' Shop right now. Speak with Ramus and he'll tell Alex that he's already heard about Luna. He tries to think of some way he can help you and so decides to give you anything in the store you need for free. Now speak with the store clerk and stock up on everything you want. After that you're ready to leave. |
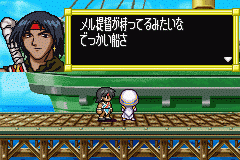 | Now to look for Kyle. It shouldn't be too hard to figure out where he is, but in case you don't like guessing then head east to the docks and enter the bar. Kyle is sulking in the back table on the bottom floor. Talk with him and you'll see that he's sufficiently drunk and has decided that since they're all doomed anyway, he may as well enjoy the time he has left. Nall tries to tell him otherwise, but he brushes it aside. Jessica says softly that he's a jerk--asked what she said, Jessica replies that he heard her: he's a jerk. If it were the real Kyle, he'd say Ghaleon's no problem and charge into battle. He's no longer the man who bragged about his strength, now he's all talk. She yells at him that if he won't go with them, she'll just go alone to face off Ghaleon and storms out. Kyle asks Alex and the rest to wait a minute as he regains composure and steps out. Kyle goes to the docks and approaches Jessica, simply saying: 'One day, I'll have a ship'. Jessica pauses and he continues: 'I'll have a ship, like Mel'. 'And then what?' Jessica asks. Says Kyle: 'so that one day I'll sail the world, see everything there is to see, and have the greatest adventure of all time'. 'Would you take me?' Jessica asks him, smiling this time. Kyle then adds that he has every intention of taking Jessica along with him, and that he'll always protect her. She smiles and says she was wrong about before; Kyle corrects her, she was right about before but now he's back to normal once again. They both return to the bar. Right then, though, Laike shows up. He asks if you still have the courage to fight Ghaleon; you can respond: 1) Of course, we'll fight!, or 2) Well.... Respond #1 to continue, and he'll ask if you're ready; respond: 1) Yes, anytime, or 2) Just a minute.... You should actually pick #2 right now. Go back to Ramus's shop, and halfway up you can go underneath the walkway on the right side to a side-room; check a red treasure chest there and grab the Magic Plate and Mirror Shield. Now go back to Laike, talk to him again, and pick #1 and he'll ask you to follow him "to the place where it all began." |
11.5) BURG - Laike Reveals Himself
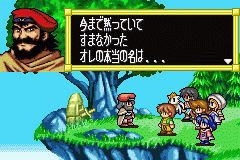 | A blink of an eye later you're in Burg, at Dyne's Memorial. Nall asks why they're there, and Laike begins to explain an event that happened fifteen years ago. You see a flashback of three of the four heroes at the base of a staircase, yelling after Dyne at the top that if he continues he'll lose his powers and the goddess will be no more. Dyne, though, reassures them that humans are capable of realizing their own future. He takes the transformed goddess--now in the form of an infant girl--and Ghaleon turns his back saying he doesn't understand. Now you're back in the present, and Laike explains that the infant girl Althena transformed into is now a human girl: Luna, Alex says. Nall though asks Laike how could he possibly know all that. Laike decides it's time now to tell you his real name: Dyne. He lost his powers long ago, and as a Dragonmaster Dyne died long ago, but he continues to live on. Ghaleon, however, is trying to revive a god--or, rather, become one himself. Now it's time for Alex to take hold of their future, as the Dragonmaster is not only the protector of the Goddess Althena, but the representative of all life. Laike then directs Alex to the sword in Dyne's Memorial, telling him to take it. Whereas before he was never able to, Alex now removes it with ease and transforms into the true Dragonmaster--complete with Althena's Sword. Nash now laments on how they'll reach Ghaleon's floating castle, since they need a flying ship again. Mia says that the Dragonmasters before would ride on a dragon, but no more are left. Laike just laughs and says there's a dragon right there: Nall. Nall is truly the White Dragon (everyone is revealing their true form now...), so just now he gets the ability to change into his true form. Right before you board Nall, the White Dragon form, Mia and Nash notice that Ghaleon's power is causing Lunar to decay--he's taking power from Lunar for his own. No time to waste, they fly via Nall to the floating castle. |