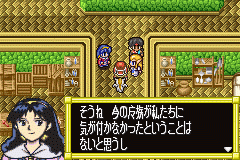
 | Walk northward into the only building there. Once you enter, Alex and the rest look around and notice that this is supposed to be a town; but, nobody's here. You continue a little northward, and Kyle suddenly spies a Vile Tribesmen and tells everyone to wait. But, the guy walks right on by--apparently he isn't concerned with them. Alex still tells everyone to be a bit cautious, but you continue. |
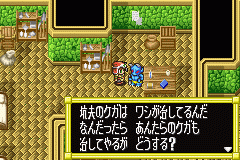 | If you continue north, a little to the west, then go on up you'll find a man sitting at a table that'll agree to heal you if you ask. When you talk he'll ask if they want to be healed, and you can answer either: 1) Please, or 2) We're ok. Pick #1 to be healed; this replaces the Althena's Statue here. After all, it wouldn't make much sense for the Vile Tribe to have a statue of the woman who banished them to the Frontier, would it? Exit the building via a doorway in the northeast corner of the building (go down from here, all the way east, then all the way north). |
10.2) TALON MINE - A Vile Mine
Dungeon Items:
[Section 1] Mental Drop (3), Barrier Ring, Heal Drop (3), Angel Tear, Wind Ring
[Section 2] Mental Drop (2), Clear Ring, Spirit Robe, Triple Ring, Holy Wrist, Shine Tiara, Heal Drop, Angel Tear
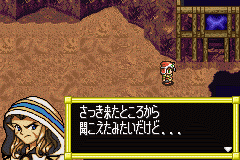 | Through the northwestern door you enter the mines. You'll start running into enemies here as it's a dungeon, just not as linear and with people you can talk to. Now, first go up through the door to the second floor. From here, the dungeon is pretty complicated; the walkthrough here will take you the quickest way through while getting all the treasures (if you want to skip this, then take the first door on the right, go all the way up through the next door, go north then northwest through the next door, and continue to the northeast from here). First, walk a little up then go east and enter the door you see. Go north, get the Mental Drop in the chest, then go back south through the same door. Now go up the ladder on the right, go northwest, take that ladder up, and enter the next door you see there. From the door go northeast (don't go up any ladders) and pick up a Barrier Ring. Go back southwest towards the door you entered through, but go up through the door across from it (through the door with the red panel above it). From here go up and follow the path; get the Heal Drop in the chest along the way and exit through the doorway at the end. From this door go west and follow the path, and left of and up from the ladder (without going up it) you'll pick up a Mental Drop. Go a little back and up that ladder, turn east immediately and go all the way north through the door on the northern wall. From here first go northeast and pick up a Heal Drop. Now go back south and then all the way west to find an Angel Tear. Go back east and up the ladder. Go west and go up the next ladder you see. From there go all the way west and pick up another Mental Drop in the chest there. Enter the door with the red panel above it next to the chest and you'll be in a small room; get the Heal Drop here and exit back out of this room. Now go southwest, down the ladder, a little bit southeast, down that ladder, and go all the way south through the doorway. From there go west along the wall and enter the next door you see (blue panel above it). In this familiar room go all the way north and through the door at the end. From here, go directly north, get the Wind Ring in the chest to the side, and continue northwest and go through the door at the end. Go northeast from here and head towards the door at the corner. You'll hear a scream. |
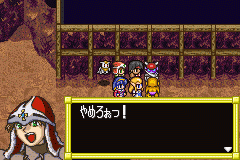 | The scream came from the previous room; backtrack a little and enter the room you just came from to find someone about to be beaten by a guard. He's insisting that he can't move any longer, and can't work. The guard is about to warn him about what happens to any worker who's no longer useful, when Alex intervenes. Kyle wants to stop him to keep a low profile, but Jessica, Mia, and Alex convince him otherwise. They run in and you get into a small battle. After defeating the guard (took me just two hits with Alex), Jessica heals the demon with her magic and suggests he take a rest. The demon thanks you and sees now that among the bad humans, there are very good humans in the world. He explains about Ghaleon's castle, that it's built of iron and so very, very strong--but he means to wipe out both good and bad humans with it. The guy thanks you and walks off. Phacia warps in after you leave, affected by what she saw. |
 | Continue on northwest from where you left off and go through the door. From here go all the way north, then east and south around the path. Pick up the Mental Drop there and continue south past there through the doorway. In this small room go southeast from the doorway, pick up the Mental Gum in the chest, and go back up and out of the room. Now go back north, then all the way west along the wall; pick up the Clear Ring and from that chest go south through the doorway. From here, go south along the path and when it splits go north along the wall. Pick up the Spirit Robe and continue east from here. Go up north through the door you'll see (with red panel above it). In this room go all the way north, get the Dark Seed in the chest, then go back south through the door. Go south from here until you hit the wall, then go west along the wall. Take the doorway below you you'll come across. Here go west along the path, through the next door, and all the way north from here to get a Triple Ring. Go back south through the door, southeast and through the next door, and in the big room again go directly east from this doorway along the wall. Go south through the next doorway. From here, go southeast from the door a bit then continue south and go through the next doorway you see. Get the Holy Wrist in the chest here, then go back up though the door. Go southwest from this door then south through another doorway. Get the Shine Tiara in this room, then go back up through the door. From here, go northwest from the doorway, then a little north and get the Mental Drop along the western wall. From the chest go east then north until you see another door. Go through this. Cross the bridge, go east then south to get a Heal Drop. From the chest go north and through another door. You'll see an Althena's Statue here and, a little bit up from there, an Angel Tear. Heal up. |
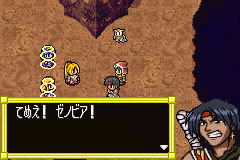 | Go north through two doors and you'll eventually come to a large room. Kyle smells something funny in the air and tells everyone to be careful. You walk a little through the cave and suddenly the lights go out. When they come back, you see Mia and Jessica trapped in a field behind Xenobia. She's holding them hostage, and tells them to choose who will die. Kyle, though, gets an idea. He nudges Alex and the two of them start mock-fighting. He starts talking at length about who's worth less to them--Jessica or Mia--and distracts Xenobia long enough for Mia and Jessica to break free. Xenobia bails and sends one of her monsters after you. |
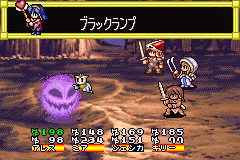 | The Black Lamp shouldn't be so difficult. I recommend the usual strategy minus Nash: first turn have Alex Kiai, Mia use Grand Weapon on Kyle, Jessica use Protect Litany, and Kyle use Heat Up. Then have Alex use Sword Dance, Mia use Fire Blast, Kyle use regular attacks, and Jessica just attack regularly (the Protect Litany should be enough to sustain you). This way took me only 3-4 turns. Once it's defeated, continue northwest, through that door, north through the next door, and you're out of the mine. |
10.3) CADIN - The Great Egg Shrine
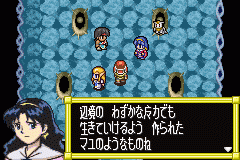 | Once you exit that infernal mine, you have two places to which you can go: Ruid, the giant factor, or Cadin, the tiny green egg beside it. The entrance to Ruid is closed, so go to the egg first. Once you enter the egg and go a little northward, Mia feels a strange living presence inside the cocoon-like things; the weaker living things here must spend their entire life in these cocoons. Jessica thinks it to be so sad, though Kyle wonders, considering that the Vile Tribe is trying to attack all of humanity. You can talk to the cocoons if you'd like. |
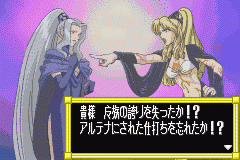 | Continue northward through two doors. You'll enter another room where you find Xenobia and Phacia arguing. Xenobia is infuriated with Phacia for her sympathy to humans. She reminds her what Althena once did to them, but Phacia doesn't believe attacking all humanity is the answer--she holds out hope that humans and the Vile Tribe can live together. Still angered, Xenobia teleports out, not wanting to hear any more. Phacia sees you approaching and welcomes you to the Vile Tribe Village of Cadin. Kyle spies the Althena's Statue behind her--that must be what Jessica and Mia sensed earlier. She's been waiting here for you to show you how to enter Ruid where the mobile fortress, the Grindery, is being built. Jessica asks why she's doing this, and Phacia tells her that Xenobia believes the Vile Tribe must take control of Althena's power to live, but she doesn't see it that way--she's hopeful that the Vile Tribe and humans can coexist. She gives Alex the password to enter Ruid: Green Earth. Phacia tells Alex to please find Ghaleon before teleporting out herself. Heal up at the statue now and exit Cadin. |
10.4) RUID - The Great Moving Fortress
Dungeon Items:
[Floor 1] Mental Drop, Mental Gum, Lucky Ring, Mind Brake
[Floor 2] Shine Wrist, Mental Drop, Heal Drop
[Floor 3] Triple Ring
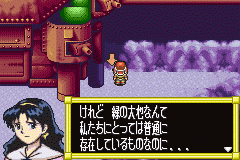 | Enter Ruid. Go up and to the right of the door check the spot where the big red arrow is pointing. Mia says the password and a passage opens. Once you enter you'll be in another dungeon, but unlike the last one this doesn't have as many twists and turns. Go north through the first doorway and in the northeast corner of this room get the Mental Drop. Continue north through two more doorways, and off to the west you'll find a Mental Gum. Continue all the way north from here and follow the path. Pick up a Lucky Ring in a chest you see on the way. Further north of here when you reach the end of the path you'll find a Mind Brake (though I prefer to keep the Phoenix Claw). Directly west of the chest you'll find the doorway to go up to the second floor. |
 | On the second floor, go directly south from the door and enter the room there. On the left you'll find a Shine Wrist. Go north out of this room, go a little bit west, then go north following the tracks. Close to the top, to the west side of the tracks, you'll see a room you can enter from the north with two chests inside. Enter this and pick up the Mental Drop and Heal Drop in here. Leave this room, head directly east, then follow the wall a little bit south. Take the next path you see to the east and follow this around to the door to the third floor. Continue north from here all the way and pick up the Triple Ring in a chest to the west just before you see the stairs. Now go up to the northeast and take the stairs to the fourth floor. There's nothing on this floor, so go either east or west, take the path south, then go back to the center and up the stairs to the fifth floor. From here, go northeast and up the stairs. Go all the way north and up those stairs, and you'll finally come to Taben's Lab. |
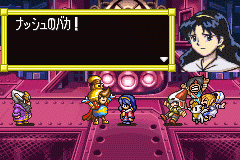 | Once you reach there, you'll find Taben laughing maniacally. He introduces himself and welcomes you to his lab. He explains that he's the main inventor and researcher for Ghaleon and, as such, can't let you pass into his grand creation: the Grindery. To ensure this, he introduces his best line of defense: Hi-Nash. Yes, Nash is back, to the anger of everyone except the worried Mia. He descends from above in magic-enhancing chicken suit and unleashes a thunder spell on the party--sparing Mia (not to kill them, but stop them long enough for Ghaleon to finish). While everyone else is frying, Mia walks up to Nash and slaps him back into sense. She asks how could he turn his back on everything: his friends, Luna, herself. Nash, downcast, then realizes the error of his ways and apologizes to Mia. Unfortunately, Taben anticipated this and overrides Nash's power over his suit. Nash, though, takes control for one last action: knocking Taben off the edge. Well, now Nash is back and all forgiven (despite earlier claims from Jessica and Kyle that they'd never forgive him). He apologizes to everyone, but right then you see Ghaleon pulling away on the Grindery. He tells Alex that he's too late. Alex demands that he release Luna, but the Magic Emperor replies that Luna is sleeping right now; she'll be revived soon enough. Ghaleon pulls away--now you have to hurry to get downstairs and back to catch up with him before he can escape the Frontier. |
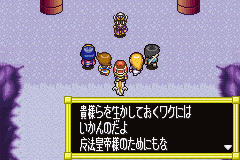 | Leave the dungeon quickly (remember, you can use Jessica's Return Litany to return to the entrance immediately for 1MP). As you leave Ruid, though, you hear Taben once again. Apparently, he doesn't die very easily. He still refuses to let you leave and will stop you at all costs to ensure Ghaleon's success. He then attacks you with his top-of-the-line mech, so prepare for battle. |
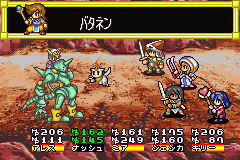 | Against Taben, I suggest the usual tactics; you should now have a few better spells though. Have Alex use Kiai, Nash use Charge if he can or just use Thunderbolt, Mia use Grand Weapon on Kyle, Jessica use Protect Litany, and Kyle use Heat Up. After this, have Alex use Sword Dance, Nash use Thunderbold, Mia use Fire Blast, Kyle attack, and Jessica attack or heal as necessary. If your defense is high enough, she shouldn't even have to heal. It took me 3-4 turns this way. After you deal with him he dies for the last time and you board the Airship. You catch up with the Grindery and, looking out, Jessica sees it headed for the Katarina Zone. Mia realizes that it's heading for the Goddess Tower and says you must head towards Vane to protect it. |